Soggy Handmade Soap: Why Bars Melt Fast and Easy Fixes
You've spent good money on a beautiful artisan bar — layered colors, real essential oils, the whole ritual. Three showers later, it's a gelatinous puddle on the dish. Sound familiar? That bar didn't necessarily fail you.
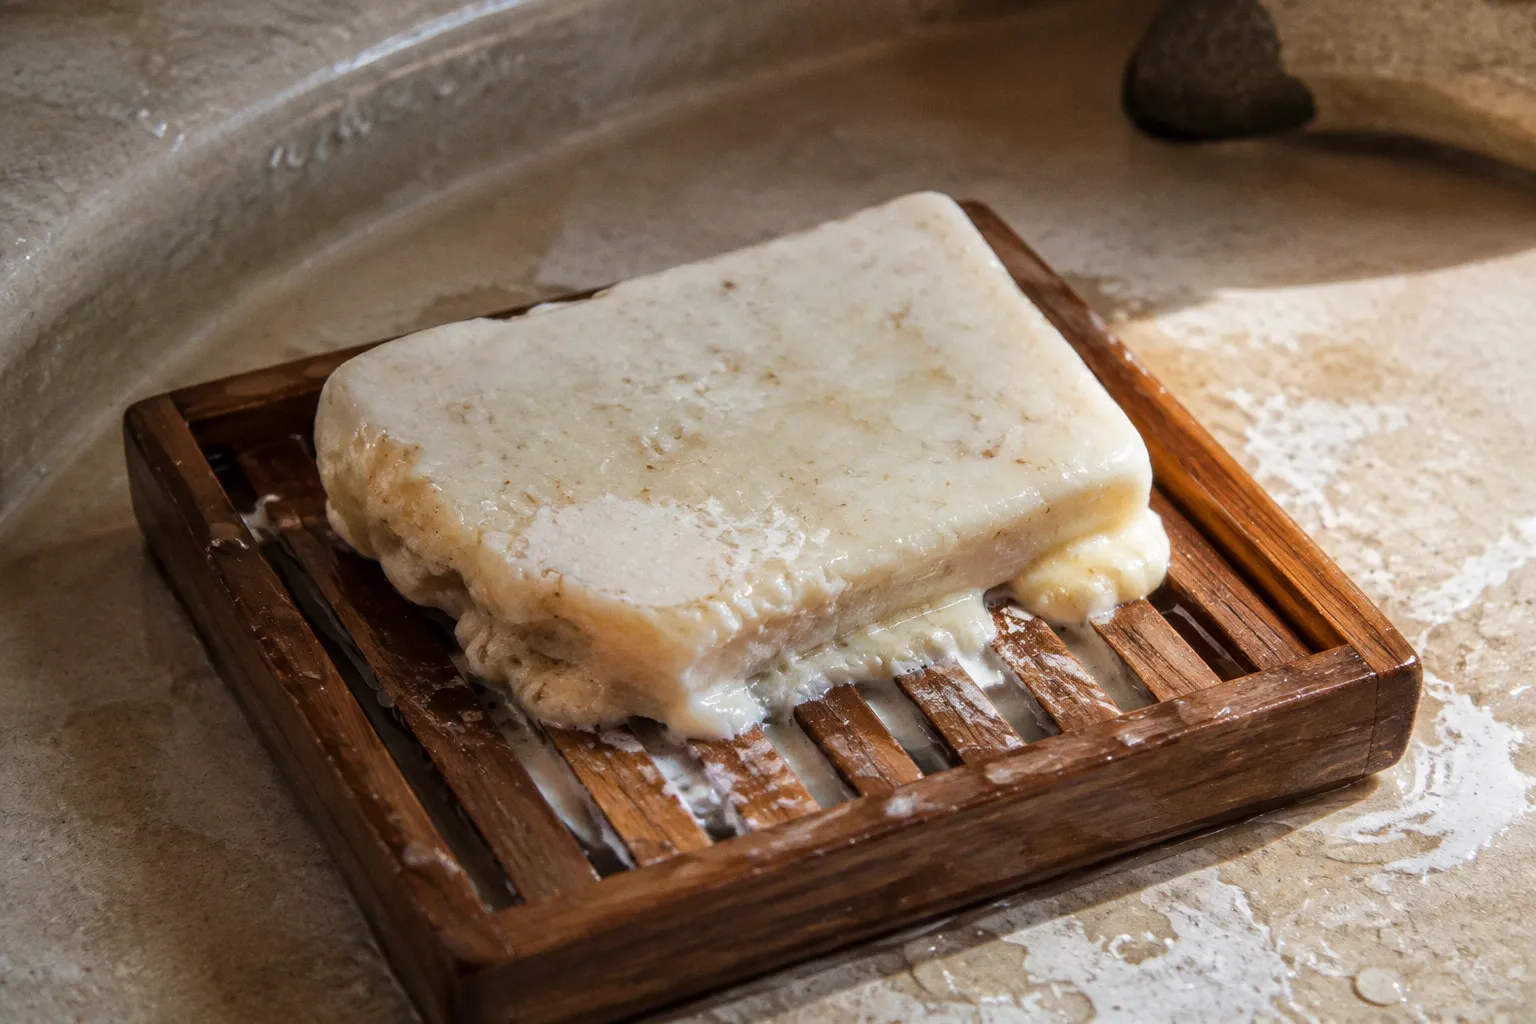
More likely, it was asked to sit in the worst possible conditions: warm water, bathroom steam, and a dish that keeps its underside wet.
Handmade cold-process soap isn't built like the commercial bar you've used for years. It may contain naturally formed glycerin, retain more moisture while it cures, and lack some of the hardening and processing steps used in mass-produced soap. That doesn't make it fragile or defective. It means the bar needs time to harden and somewhere to drain.
If you're wondering why handmade soap is melting too fast in the shower, start with three questions: Was the bar fully cured? Is water able to leave the dish completely? Does the soap dry between uses? Those details usually matter more than the price of the bar, the fragrance, or how impressive it looked at the market stall.
The Science of Glycerin and Humidity in Cold-Process Soap
Cold-process soap is made when oils and fats react with an alkaline solution in a process called saponification. Glycerin forms naturally during that reaction. In many handmade recipes, it remains in the finished bar rather than being separated during industrial processing.
That retained glycerin is one reason handmade soap can feel pleasant and less harsh on the skin. Glycerin is a humectant: it attracts and holds water. On your skin, that can support a softer, more comfortable after-feel. In a wet shower, however, the same property gives the bar another way to take on moisture.
The source of that moisture does not matter much to the soap. It can come from direct spray, droplets left on the surface, condensation, or humid air. The more often the bar becomes wet without having time to dry, the more its outer layer softens. Each subsequent use then removes some of that softened material, and the process accelerates.
A slightly soft or tacky bar is not automatically a sign of a badly made recipe. It may still be finishing its cure, or it may simply have absorbed moisture in transit or storage. What matters is whether the softness improves when the bar is kept in a dry, ventilated place.
Glycerin is excellent on skin and inconvenient in a puddle. A handmade bar needs both a proper cure and a way to dry after every use.
The Humidity Problem in Most Bathrooms
The bathroom is a difficult environment for any solid soap. A hot shower raises the humidity, and the moisture settles on nearby surfaces. If the soap is sitting on an open shelf close to the shower, it may be collecting condensation even when nobody is actively washing with it.
That explains why the same bar can feel firm at a dry kitchen sink and soft in the shower. The difference is not necessarily the soap. It is the amount of water surrounding it and the amount of time available for drying.
Humidity becomes especially troublesome when combined with poor drainage. A bar exposed to damp air may soften at the surface; a bar sitting in a shallow pool can remain wet on the underside for hours. The two problems reinforce each other. The soft underside is damaged during the next wash, while the upper surface may never fully firm up.
Ventilation helps, but it is not a complete solution. A bathroom fan, open door, or window can reduce lingering steam, yet the bar still needs to be lifted away from standing water. Air movement works best when water has somewhere to go.
Why Curing Time Determines Your Bar’s Longevity
Curing is the drying and hardening period after the soap has been removed from its mold. Saponification may be largely complete before the bar is ready for daily shower use, but the finished soap can still contain more water than it will have after a longer cure. As moisture leaves, the bar generally becomes firmer and more resistant to being worn away by water.
Many cold-process soap makers cure standard recipes for around four to six weeks. Recipes rich in softer oils, especially traditional olive-oil-heavy formulas, may benefit from a longer cure. The right timing depends on the formula, the size of the bars, the curing conditions, and the maker's process.
The important point is not to treat a calendar range as a guarantee. A bar that has spent several weeks in a cool, dry, well-ventilated space may behave differently from a bar of the same age that was packed early and stored in a humid room.
The Water That Stays in the Bar
A newly cut bar can look finished while still feeling noticeably soft. Its surface may dent easily, its edges may be delicate, or the bar may develop a tacky feel when exposed to moisture. Those are practical signs that it may need more time before it is placed in the shower.
Longer curing usually improves the bar's ability to handle repeated wetting, but curing is not a magic fix for every formulation. A recipe with a high proportion of soft oils may remain more delicate than a recipe built around harder fats. A bar that is fully cured can still dissolve quickly if it is left in water.
There is no safe household shortcut that turns an unfinished cold-process bar into a properly cured one. Baking, microwaving, or using strong heat can cause cracking, uneven drying, discoloration, fragrance loss, or melting. Slow curing in open air at room temperature is still the dependable approach.
What to Ask the Maker
When buying handmade soap, ask when the bar was made or cut and how long it was cured before sale. A careful maker should be able to explain the curing schedule, even if the answer is not printed on every label. Some makers date their batches; others include a suggested ready-to-use date.
Pay attention to how the bar feels in its packaging. A little surface tackiness is not conclusive, particularly if the soap has been exposed to heat or humidity. But if it feels rubbery, dents under light pressure, or leaves moisture inside the wrapper, it may need additional drying time.
If you already own a soft bar, place it somewhere dry and airy for a while rather than putting it straight into the shower. Keep it away from direct sunlight and heat. Give it room on all sides so that air can reach the surface instead of sealing it inside a container.
Strategic Storage: Choosing the Right Draining Dish
This is where many otherwise good bars lose the battle. A beautiful ceramic dish may look appropriate beside the sink, but a flat surface can hold a thin film of water beneath the soap. The top of the bar appears dry while the underside remains soft.
The fix is not complicated: the soap needs to sit above the water, not in it. Look for a holder with slots, ridges, holes, or an open grid. The bar should make limited contact with the surface, and the water should be able to leave the holder rather than collect underneath.
A draining dish also needs occasional cleaning. Soap residue can block narrow channels, and a holder that once drained well can gradually become a shallow reservoir. Rinse it, clear the openings, and wipe away the slippery film before it becomes part of the problem.
| Storage option | How it helps | What to watch for |
|---|---|---|
| Bamboo slatted dish | Raises the bar and allows water to run between the slats | It still needs to dry between cleanings |
| Ridged ceramic or stone tray | Channels water away while keeping a solid, attractive base | Shallow grooves can clog with soap residue |
| Silicone soap saver | Provides flexible drainage and is easy to rinse | It should not sit in a pool inside the shower |
| Loofah or sisal pad | Lifts the bar and helps separate it from a wet surface | Replace it when it stays damp or develops buildup |
| Magnetic soap holder | Keeps the bar suspended with very little surface contact | The attachment must be secure and placed away from the strongest spray |
| Mesh soap saver pouch | Lets the bar drain while hanging and can be useful for travel | Hang it where air can reach the pouch from all sides |
The material matters less than the design. A wooden dish without enough space between the slats can perform poorly; a simple silicone grid can work very well if it is kept clear. A ridged tray placed directly under the shower stream will not save the bar, because the water is still arriving faster than it can drain.
The Flat Dish Test
After a shower, lift the bar and look at its underside. If it is shiny, slimy, or leaving a soft imprint on the dish, the holder is not doing enough. Tip the dish over the sink. If water pours out, or if the base remains visibly wet, you have found one of the cold-process soap draining dish mistakes that causes the most trouble.
The bar should be able to dry on every side. It does not need to be suspended in a laboratory setup, but it should not be pressed against a continuously damp surface. Even a small gap can make a meaningful difference when repeated after every use.
Cut the Bar in Half
A thick bar does not have to live in the shower all at once. Cutting it in half lets you keep part of the soap dry while the other part is in use. Store the unused portion somewhere cool and dry, preferably with air around it rather than sealed in plastic.
This is especially useful when you have several bars waiting to be used. Smaller portions are easier to handle and less likely to be left under a stream of water. The method is simple, but it works only if the spare half is actually kept dry. A second piece sitting beside the first in the same wet dish has gained you nothing.
Use a clean, sharp knife and work slowly. Very hard or highly decorated bars may chip, while fresh or soft bars can deform. If the soap is difficult to cut, let it firm up in a dry place first rather than forcing the blade through it.
Formulation Secrets for Harder, Longer-Lasting Bars
If you make cold-process soap yourself, the formula determines much of the bar's starting character. Hard fats and oils can contribute to a firm structure, while softer liquid oils often produce a gentler, more conditioning bar that may need more time to cure.
That does not make one category universally better. A very hard bar can feel less pleasant if the recipe is poorly balanced, and a softer bar can be perfectly enjoyable when it is fully cured and stored well. Longevity is the result of formulation, cure, and use conditions working together.
Hard Oils, Soft Oils, and the Balance of the Bar
Coconut oil is known for producing a firm bar and a bubbly lather, although the amount used affects the final skin feel. Cocoa butter can add firmness and a smoother structure. Shea butter contributes a different balance of hardness and conditioning. Palm oil, where a maker chooses to use it and sources it responsibly, is also traditionally used to build a harder, longer-lasting bar.
Olive oil creates a mild, conditioning soap, but olive-heavy formulas can remain soft for longer and often reward an extended cure. Sunflower, sweet almond, and other liquid oils can add desirable skin-feel qualities while also making the bar less resistant to water if they dominate the formula.
A soap recipe should therefore be judged as a whole. Changing one oil changes the balance of hardness, cleansing, lather, conditioning, and cure behavior. Simply adding more hard oil is not always the best answer.
| Formula direction | Likely bar behavior | Practical implication |
|---|---|---|
| More hard fats or oils | Firmer structure and better resistance to softening | Still needs drainage after use |
| More liquid, unsaturated oils | Creamier or more conditioning feel, often with a softer bar | Allow a generous cure and avoid pooled water |
| Olive-oil-heavy recipe | Mild soap that can improve with extended curing | Do not judge it too early |
| Added butter such as cocoa or shea | Can contribute firmness and a richer feel | The overall formula remains more important than one ingredient |
| High water exposure during use | Faster softening regardless of the recipe | Move the holder away from direct spray |
There is no single oil ratio that guarantees a long-lasting bar. Soap calculators can help a maker assess hardness and other properties, but those numbers are guides rather than promises. The same recipe can behave differently depending on the water amount, mold size, cure environment, additives, and storage.
Hardness Boosters Worth Considering
Some makers use sodium lactate or a small amount of salt to help a bar firm up or release from the mold more cleanly. These ingredients can be useful tools, but they are not substitutes for a sound recipe and a full cure.
Sodium lactate is commonly added to cooled lye solution. It can make fresh soap easier to unmold and may contribute to a firmer early texture. The amount matters, and adding too much can create its own problems.
Salt can also affect hardness when used carefully. Too much may make the bar crumbly or reduce the qualities the maker wants from the recipe. If you are experimenting, change one variable at a time and record the result. A bar that is hard on the first day is not necessarily a bar that will perform well in the shower.
For buyers, the practical lesson is simpler: ask whether the formula is intended to be used soon or allowed to cure longer. For soap makers, keep notes on batch composition and curing conditions. If every bar is soft, the problem may be the water content, the oil balance, the cure environment, or the storage method — not just the absence of one additive.
Simple Habits to Prevent Premature Soap Dissolution
Even a well-formulated and fully cured bar can become soggy if it is treated like a bath toy. Daily handling determines how much water reaches the soap and how long that water remains in contact with it.
Keep the Bar Out of the Water Stream
Leaving the bar under the showerhead is the fastest way to create a soft surface. Move the dish to a corner ledge, a side wall, or another location where the bar is reached by water only during active use.
This is more effective than repeatedly replacing a damaged dish. If the holder is in the path of running water, even excellent drainage may not be enough. The soap is being re-wetted continuously.
Rinse, Then Put It Down Properly
After lathering, rinse off loose residue without holding the bar under a strong stream. Place it on the draining surface so that no large, flat side is sealed against it. If the bar has developed a soft layer, handle it gently; scraping or squeezing the softened surface removes more soap than necessary.
A bar does not need to be perfectly dry before it returns to its holder. It does need the chance to dry. That means drainage underneath, airflow around the sides, and enough distance from the shower spray.
Lather With a Washcloth or Pouf
Rubbing the bar directly against your body or repeatedly grinding it between wet hands can wear it down faster than building lather with a washcloth, sisal pouf, or exfoliating glove. The accessory creates lather from a smaller amount of soap and can make the bar easier to use without pressing hard.
This is not about saving every last flake. It is about reducing unnecessary abrasion while the surface is already soft. Rinse the cloth or pouf after use and let it dry as well; a permanently wet accessory can transfer moisture back to the bar.
Rotate Two Bars
If one bar is always in use, rotate it with another. Let the first bar dry on a draining rack while the second is being used. This gives each piece more time away from water and steam.
Rotation is particularly helpful for people who shower frequently or keep the soap in a humid bathroom. It does not make either bar immune to dissolution, but it reduces the amount of uninterrupted wet time. Store the spare bar outside the shower rather than on a second wet corner of the same dish.
The useful question is not whether a bar can get wet. It is whether the bar gets enough dry time before it gets wet again.
Store Outside the Shower Steam
If the room stays steamy long after a shower, move the soap to a vanity, bedroom shelf, or another dry place between uses. A holder outside the direct steam zone gives the bar a better chance to firm up before the next wash.
This is one of the easiest soggy soap bar fixes because it costs nothing. It may be less convenient than leaving the soap on a shower shelf, but convenience is not helpful when the shelf keeps the bar damp all day.
Don't Leave It in the Wrapper
A paper wrapper can be useful for labeling and short-term protection, but it can also trap residual moisture if the bar is packed before it has finished curing. Do not assume that wrapped soap is automatically being stored correctly.
For long-term storage, follow the maker's instructions. Unfinished bars generally need airflow; fully cured bars can be protected from dust while still being kept in a dry environment. A bathroom drawer is not necessarily dry simply because it is closed. If the room regularly fills with steam, a linen closet or other dry storage area is a better choice.
The Rule That Ties It All Together
Your handmade soap is not broken because it softens in a wet shower. It is a water-soluble product, and cold-process soap often brings its natural glycerin along for the ride. The goal is not to prevent water from touching the bar. The goal is to prevent water from staying on it longer than necessary.
Start with the basics: buy or make sure the bar has had enough time to cure, use a holder that drains completely, and keep the soap out of the direct water stream. Then add the small habits that make those choices work — rinse away residue, let the bar breathe, rotate pieces when useful, and move the soap out of a steamy shower area.
If the bar still turns soft after all of that, look more closely at its formulation and age. A soft-oil-heavy recipe may need a longer cure, while a batch with a persistent problem may point to an issue in the recipe or process. But before blaming the soap, check the dish. A bar cannot harden while sitting in yesterday's shower water.