Grainy Shea Butter: Why It Happens and How to Fix It
You twist open a fresh jar of handcrafted beard balm, expecting that smooth, scoopable finish, and instead find something that looks and feels like wet sand.
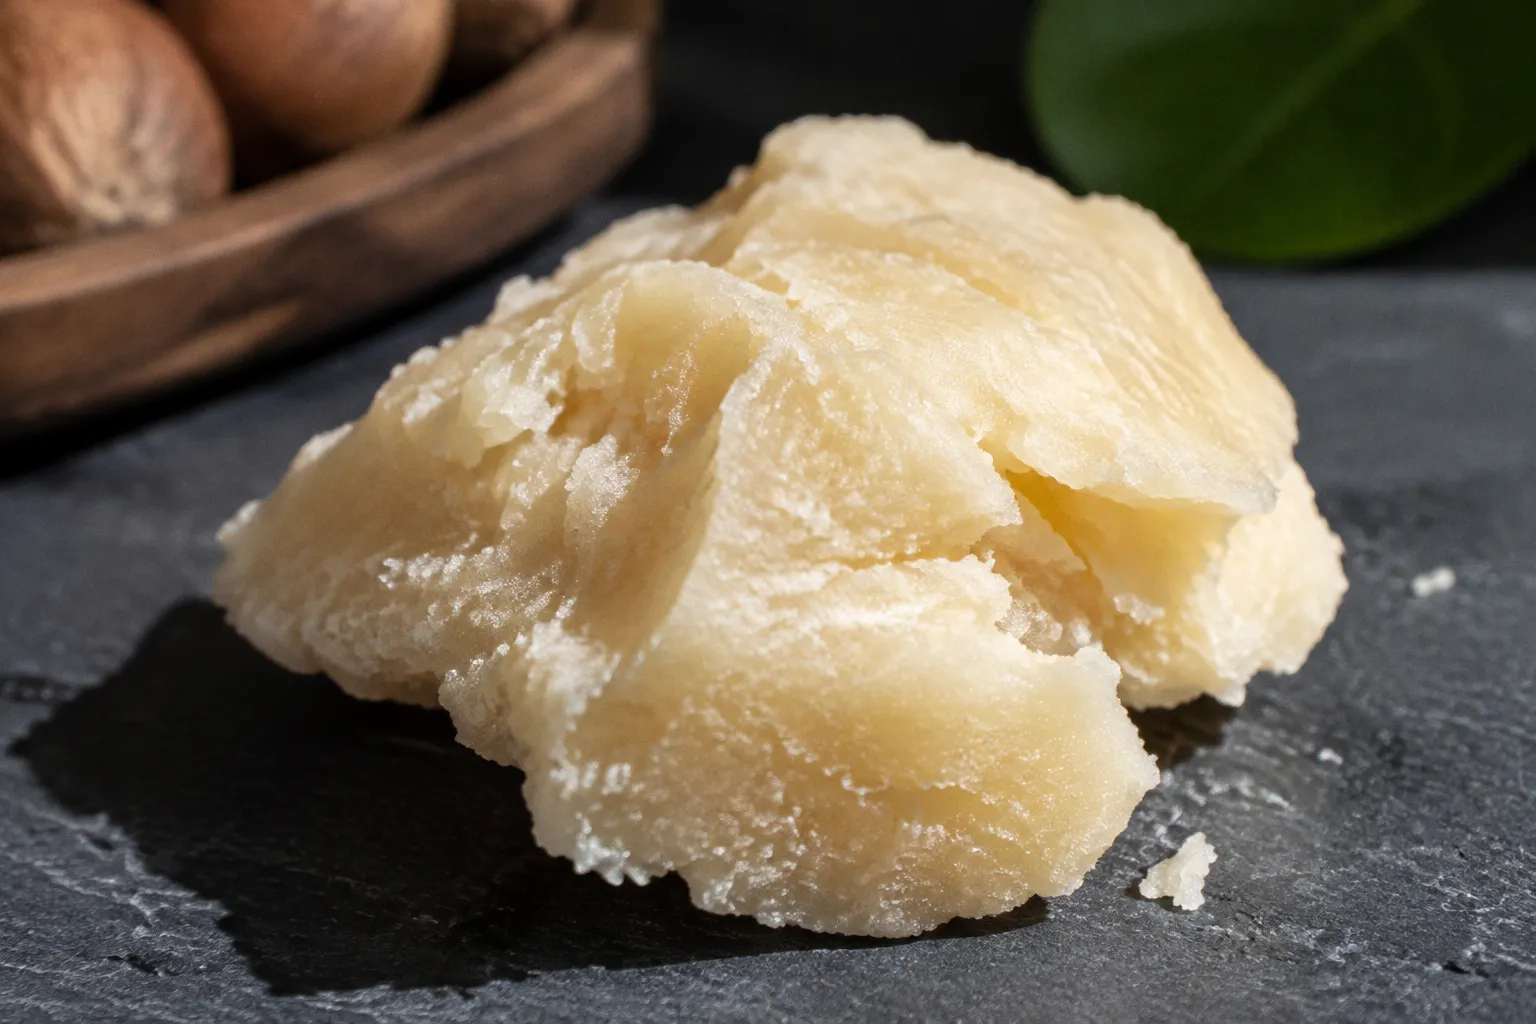
Your first instinct is that the butter has gone bad, the heat ruined it, or the batch was defective.
Usually, that is not what happened.
What you are seeing is fat bloom: a physical rearrangement of the fatty components as they melt and crystallize at different rates. The result is a rough, sandy texture rather than the dense creaminess you expected. It is especially common in unrefined shea butter, whipped body butter, beard balm, and other formulas that contain a high proportion of natural fats.
The important distinction is this: graininess is a texture problem first. By itself, it does not prove that the butter is spoiled, contaminated, or stripped of its useful properties. The texture can often be repaired with a controlled remelt and a faster, more even cool-down.
As a barber who builds balms for the shop and works with unrefined butters every week, I run into this constantly. The chemistry is more interesting than the problem looks, and once you understand what is happening inside the jar, the fix becomes much less mysterious.
The Chemistry of Lipid Rearrangement: Why Shea Butter Crystallizes
Unrefined shea butter is not one uniform substance. It is a blend of several fatty acids and other naturally occurring components, each with its own melting behavior and crystallization pattern.
The two dominant fatty-acid fractions are generally oleic acid, at about 43–56%, and stearic acid, at about 31–45%. Smaller amounts of palmitic acid and linoleic acid, often around 4–8% each, complete much of the fatty profile. The exact composition varies with the shea nuts, region, processing method, and batch, but the practical point remains the same: the butter contains fractions that do not melt or solidify together.
When the butter is melted and cooled under controlled conditions, those fractions can form a relatively fine and even crystal network. That is what gives a finished balm its smooth, creamy feel. A well-made butter usually melts readily from body heat without feeling sandy or waxy.
The trouble begins when only part of that network melts.
A warm bathroom, a sunny windowsill, a delivery vehicle, a heated warehouse, or repeated movement between a cool room and a warm one can soften the lower-melting fractions while leaving higher-melting crystals behind. When the liquid fats cool again, they do not necessarily return to their original arrangement. They can settle around existing crystals and gradually build larger structures.
Your fingertips read those larger structures as grit.
This is why a jar can look perfectly normal when it is first made and become grainy later. It does not need to be completely liquid for the process to begin. Partial melting followed by slow or uneven cooling is enough to change the texture.
Graininess is a physical lipid rearrangement, not automatic evidence of spoilage. The texture has changed, but the appearance of crystals alone does not establish that the butter has lost its usefulness.
Why whipped shea butter turns grainy
Whipped shea butter is particularly prone to texture changes because whipping introduces air and usually involves repeated warming and cooling. The mixer itself can soften the butter, especially around the sides of the bowl. If the butter is whipped while it is still warm, the mixture may appear beautifully fluffy at first but later develop coarse crystals as it sets.
The same thing can happen when a finished whipped butter is stored somewhere with daily temperature swings. It may soften slightly during the day, firm up overnight, and repeat that cycle for weeks. Each cycle gives the fat crystals another opportunity to reorganize.
A gritty whipped product is not necessarily a failed recipe. It may simply have been cooled too slowly, disturbed while setting, or exposed to enough warmth to partially melt the softer fractions.
Melting Point Disparities: The Role of Stearic and Oleic Acids
Here is where the science gets specific, and where many home formulators get tripped up.
- Oleic acid melts at roughly 13–14°C (55–57°F). It is a relatively low-melting fraction and can become liquid in conditions where the rest of the butter still looks firm.
- Stearic acid melts at roughly 69–70°C (156–158°F). That is high compared with the temperature of a typical room and much higher than the melting range of shea butter as a finished blend.
- Palmitic acid melts at approximately 63°C (145°F).
- Linoleic acid has a much lower melting point and remains liquid under ordinary room conditions.
The boiling-point comparison is worth getting right. Stearic acid’s melting point of about 69–70°C is lower than the boiling point of water at sea level, which is about 100°C (212°F). It is still considerably hotter than the temperatures usually used to soften or melt a jar of shea butter, but it is not hotter than boiling water.
That distinction matters because the bulk butter can become liquid long before every higher-melting fraction has been fully incorporated into the melt.
Shea butter as a whole commonly melts across a range of roughly 32–38°C (89–100°F). That range is why it feels so comfortable in a beard balm or body butter: the product can remain solid in a room but soften quickly against warm skin. The blend’s overall melting behavior, however, should not be confused with the melting point of every individual fatty acid inside it.
| Fatty fraction | Approximate share in shea butter | Approximate melting point | What it means in a formula |
|---|---|---|---|
| Oleic acid | 43–56% | 13–14°C (55–57°F) | Softens or liquefies readily during mild warming |
| Stearic acid | 31–45% | 69–70°C (156–158°F) | Higher-melting fraction that can remain crystalline after a partial melt |
| Palmitic acid | 4–8% | About 63°C (145°F) | Contributes to the firmer crystalline structure |
| Linoleic acid | 4–8% | About −5°C (23°F) | Remains liquid under ordinary room conditions |
When a jar is only partly melted, the lower-melting fractions move first. The remaining higher-melting crystals act as a framework. As the mixture cools, the liquid fats can deposit around that framework instead of forming the small, evenly distributed crystals that gave the original butter its smooth feel.
That is the basic reason why unrefined shea butter turns grainy. It is not one ingredient suddenly becoming defective. It is a blend losing a uniform crystal structure.
Storage, transit, and formulation can all play a part
It is tempting to blame storage because temperature changes are easy to observe after a product leaves the maker. But storage is only one possible stage in the process.
Graininess can develop:
- while raw shea butter is being stored;
- during melting and mixing in a workshop;
- while a whipped product is setting;
- during transit through changing temperatures;
- on a warm retail shelf or windowsill;
- in a bathroom where heat and humidity rise and fall;
- or after repeated warming and cooling in the customer’s home.
That is why it is too simple to call every gritty jar a storage failure. Slow cooling during formulation or manufacture can create the same texture before the product is ever packed. A product can also be made smoothly and later become grainy after enough temperature fluctuation.
The 175°F Threshold: Ensuring Complete Fraction Liquefaction
Most people trying to fix grainy shea butter make the same mistake I used to make. They place the jar in warm water, wait until the butter looks liquid, pour it back into the container, and then wonder why the grit returns later.
The reason is that a liquid-looking surface does not necessarily mean every crystal has melted.
A warm water bath may be enough to soften the bulk butter, but it may not provide enough heat to fully clear the higher-melting stearic and palmitic crystals. Those remaining crystals can act as seed points during the next cool-down. If the product is then allowed to cool slowly on the counter, the original texture problem may return.
For a complete remelt, a practical working target is 175°F (80°C), held for approximately 10–20 minutes, provided the formula and equipment are suitable for that treatment. The purpose is not to cook the butter. It is to give the entire fat phase enough time to become genuinely uniform.
Use a thermometer rather than judging by appearance alone. The melt should be clear or consistently translucent, with no visible grains, flakes, or cloudy fragments floating through it. Stirring gently helps distribute heat and prevents warmer and cooler pockets from developing.
The target is especially useful when you are repairing pure shea butter or a simple butter-rich balm. More complex formulas may contain waxes, essential oils, botanical extracts, preservatives, or heat-sensitive ingredients that require a different process. A high-temperature remelt can change the character of those materials, so a formulator should follow the requirements of the complete recipe rather than treating every finished product as pure butter.
The principle is straightforward: a partial melt can leave behind the very crystals you are trying to remove.
The Fix: A Step-by-Step Protocol
This is the method I use for pure shea butter and straightforward butter-based products such as beard balms and body butters. Work carefully, especially if the product contains ingredients beyond oils, butters, and waxes.
1. Choose an indirect heat source.
Use a double boiler: a heat-safe glass or stainless-steel bowl over a pot of gently simmering water. Direct contact with a hot burner makes scorching and localized overheating more likely.
2. Break the butter into small pieces.
Large blocks can remain solid in the middle while the outside becomes very hot. Smaller pieces melt more evenly and are easier to stir.
3. Heat gradually.
Stir with a clean silicone spatula as the butter softens. Keep the bowl stable and avoid splashing water into the product. Water contamination can create separate quality problems, particularly in products without a suitable preservative system.
4. Bring the melt toward 175°F (80°C).
Use a reliable thermometer. Do not rely on the fact that the butter appears liquid; visible smoothness at the surface is not proof that every crystal has dissolved.
5. Hold the temperature for about 10–20 minutes.
A hold of roughly 15–20 minutes is a practical choice for many simple butter-rich formulas. Stir occasionally and keep the heat controlled. The goal is a uniform melt, not aggressive boiling or prolonged cooking.
6. Remove the bowl from the heat.
Pour the melted product into a clean, completely dry container. Glass or metal is the safer choice while the mixture is still hot. Handle the container with care, because the product and vessel may both be hotter than they look.
7. Cool quickly and evenly.
Move the container into a refrigerator or freezer, depending on the size of the batch and the equipment available. Rapid cooling reduces the time available for large, uneven crystals to form.
8. Leave it undisturbed while it sets.
Avoid opening the container, stirring it, or moving it repeatedly. Every interruption can create warmer and cooler zones and make the final structure less uniform.
9. Allow the product to temper before use.
Once fully solid, let it sit at room temperature until it reaches the consistency you want. If you prefer a softer, scoopable butter, taking it out while the center is just beginning to firm can help it finish setting without an extended, slow counter cool.
Repairing grainy shea butter is a two-part job: melt the crystal network completely, then cool the new melt quickly enough to form a finer structure.
What not to do
A few common shortcuts make the outcome less predictable:
- Do not microwave a full jar for long, uninterrupted bursts. The outside can overheat while the center remains solid.
- Do not place a sealed container in very hot water without allowing for pressure and heat expansion.
- Do not add water to make the texture smoother. Water changes the product and may create preservation and stability concerns.
- Do not keep stirring a cooling butter for an extended period if your goal is a firm, smooth set. Agitation can introduce air and create uneven cooling.
- Do not assume that a refrigerator will repair a partially melted product if the melt was never made uniform in the first place.
If the product contains fragrance, essential oils, extracts, or other heat-sensitive components, consider whether they should be added after the butter phase has cooled to the appropriate processing temperature. For a commercial or carefully formulated product, the whole formula matters more than a single ingredient’s behavior.
Debunking the Spoilage Myth: Why Graininess Doesn't Affect Efficacy
Grainy shea butter has not automatically gone bad.
Texture alone cannot tell you whether a product is spoiled. A rough or sandy feel is consistent with crystallization and does not, by itself, demonstrate microbial contamination, rancidity, or a loss of all beneficial compounds. In many cases, the same fatty components are still present; they have simply rearranged into a less pleasant structure.
The practical distinction is between graininess and other warning signs.
A product deserves closer scrutiny if it has:
- a sharply rancid, sour, or otherwise unusual odor;
- visible mold or unexplained discoloration;
- signs that water or another contaminant entered the container;
- a leaking, swollen, or damaged package;
- a formula that has separated in a way the maker did not intend;
- or an age and storage history that make oxidation or contamination plausible.
Those signs are not explained by ordinary fat bloom. If they are present, remelting the product is not a complete answer. Heat can change texture, but it does not reverse every form of degradation, and it is not a substitute for sensible product assessment.
For a jar that is simply grainy, the main penalty is feel. It may drag slightly over the skin, feel less luxurious, or leave small crystals that take a few seconds longer to melt. Once rubbed between the fingers or worked into a beard, body heat usually softens those crystals.
That does not mean every gritty product will have exactly the same performance as a smooth one. A severe or repeated temperature history may affect fragrance, color, firmness, or other aspects of the formula, especially when the product contains more than pure shea butter. The careful wording is that graininess alone is not evidence of lost efficacy or shortened shelf life.
Nor can you determine shelf life from texture alone. Temperature fluctuations may contribute to crystallization, while heat, light, oxygen exposure, moisture, and contamination can influence the broader condition of a product. A grainy jar should be judged in that wider context rather than treated as either unquestionably fresh or automatically ruined.
What the grit does tell you is that the product experienced a change in its crystal structure. That change may have occurred during formulation, cooling, storage, transit, or some combination of those stages.
Preventing Graininess Next Time
Repairing grainy shea butter is useful. Preventing the texture from developing in the first place is easier on both the maker and the customer.
- Keep the temperature stable.
Store finished balms and butters in a cool location away from direct sunlight and major heat swings. A bathroom shelf is often a poor choice because showers create repeated changes in heat and humidity.
- Treat shipping as part of the formulation problem.
A product can leave the workshop with a smooth texture and encounter very different conditions during transit. Packaging, insulation, delivery timing, and seasonal temperatures all affect how much warming and cooling the jar experiences. It is safer to describe transit heat as a possible contributor than to assign it a universal rank as the main cause of every return.
- Cool freshly made products promptly.
If a formula is designed to be cooled quickly, do not leave the filled containers on a warm counter for hours. Controlled cooling during production can be as important as storage after production.
- Whip shea butter only after it has cooled sufficiently.
For a whipped product, the butter should be firm enough to hold structure but workable enough for the mixer. Short mixing intervals reduce unnecessary heat. If the bowl, beaters, or motor are warming the mixture, pause and cool it before continuing.
- Avoid repeated partial melts.
Scooping a jar with warm hands is not usually a crisis, but leaving it near a radiator, in a hot car, or in a sunny window creates a much larger temperature cycle. Keep the container where it will not repeatedly soften and reset.
- Use smaller working batches when appropriate.
Smaller amounts are easier to melt, mix, cool, and finish before they pass through many seasonal temperature changes. This is a practical choice for home formulators and small makers, not a guarantee against graininess.
- Choose packaging with the product’s use in mind.
A wide-mouth jar makes a firm beard balm easy to scoop, while a tube or pump may reduce repeated exposure to warm fingers. Packaging will not correct poor crystallization, but it can limit handling and temperature stress.
- Record the cooling process.
For makers, noting the melt temperature, hold time, fill temperature, and cooling conditions can reveal patterns. If one batch becomes grainy while another does not, the cause may be in the production process rather than the raw shea butter itself.
The most reliable prevention strategy is not one magic storage temperature. It is a controlled process from melt through final set, followed by reasonably stable storage.
The Barber's Rule
Grainy shea butter is one of the more manageable problems in small-batch skincare. It looks dramatic because texture is the first thing your fingers notice, but the underlying issue is often a crystal structure that formed badly rather than a product that has suddenly become useless.
The rule I give every apprentice who touches a balm in the shop is simple:
Melt the crystal network completely, then cool the new structure quickly and evenly.
That covers the whole repair: enough heat to remove the stubborn crystals, enough holding time to make the melt uniform, and a controlled cool-down to prevent large grains from taking over again.
If a jar is merely grainy, do not throw it out on sight. Check its smell, appearance, age, ingredients, and storage history. If those look normal, the texture can often be repaired. And if you are making the product yourself, pay as much attention to the cooling stage as you do to the recipe.
The grit is not a verdict. It is a clue that the fats have rearranged. Melt them properly, cool them with intention, and the butter can return to the smooth, workable texture that made you reach for it in the first place.